Cervical collars are specifically designed to immobilise the part of the spine in someone’s neck. These will be used when a patient has a suspected spinal injury. After things such as car crashes, most people involved may be fitted with cervical collars. You need to fit one onto a casualty with the greatest care. This is because it is very likely that you could cause further damage if not done properly. There are many different types of collar so be sure to familiarise yourself with whichever one you own.
Measuring Collars
On the collar, there is a sizing mark. It is normally a black line on the right-hand side of the collar. This is the place to actually measure from. To measure, you are looking from the black line to the hard, plastic edge of the collar. You are comparing these to the shoulder and the jawline, so it is a snug fir. It is important not to measure from the soft foam. The measurements themselves are two little arrows which will give you the actual size settings. There will also be a locking mechanism.
So to adjust the collar, pull the collar forward and it will ratchet and extend. Once you have got the correct measurement, activate the locking mechanism. There may be a secondary locking mechanism such as velcro to go over the primary locking mechanism. Again, this will depend on the variant of cervical collar. There may also be places to fit an oxygen mask to after application – keeping it in place.
Putting on Collars
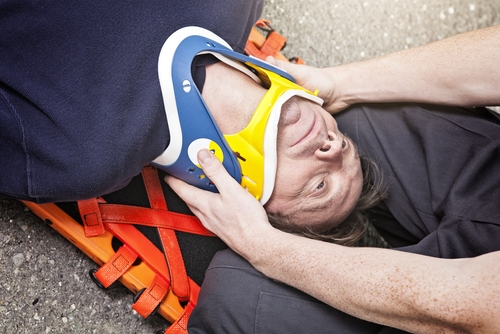
Make sure that the head is in neutral alignment. It will not fit properly if the head slumps forward, back or to either side. Neutral alignment is nose over the sternum, so we get a right angle with the jaw. After measuring the collar and setting it to the correct size, bring the chin piece to the front. Place two fingers through the collar and three fingers on the outside of the collar. Place the collar flat on the chest and gently slide the collar up underneath the chin. The collar is then passed behind the neck of the patient until all the way around.
Once the collar is in position, remove all clothing from underneath the collar itself. If a piece of clothing was stuck underneath the collar, the fabric may rub on the skin, or even add too much pressure to the neck and cause more pain. Once there is no clothing underneath the collar, tighten the collar so it has immobilised the neck.
Things to Remember
- There is more than one type of collar, and many types do exist.
- Practice makes perfect and you do need to practice this regularly to become good at it.
- Most importantly: C-spine immobilisation must be in place at all times whilst fitting the collar. This page only covers measuring and fitting the collar, not C-spine immobilisation itself.
For more information on training courses, visit our “Courses” page which also includes our First Responder and First Person on Scene (FPOS) Courses. If you have any queries, don’t hesitate to contact us via our website or call us on 01206 805359.